
API Keys
Create an API key in the Portal, set its permissions, and restrict it to your IP addresses.
Every request to the Harbor API needs an API key in the X-API-KEY header. You create and manage keys in the Harbor Portal.
ACTION REQUIRED
From November 1, 2026, API keys with no IP addresses added stop working. Add your IP addresses to every active key, or turn off Enforce IP whitelist for a key. See Update a Key.
Get a Key
How to create a key in the Portal.
- Log in to the Harbor Portal and open API Keys.
- Click Create API Key.
- Enter a Name, such as
Production Backend. - Choose the Permissions.
- Add the IP whitelist, the addresses that can use the key.
- Leave Enforce IP whitelist on, which is the default. See Restrict by IP.
- Click Create API Key, then copy the key.
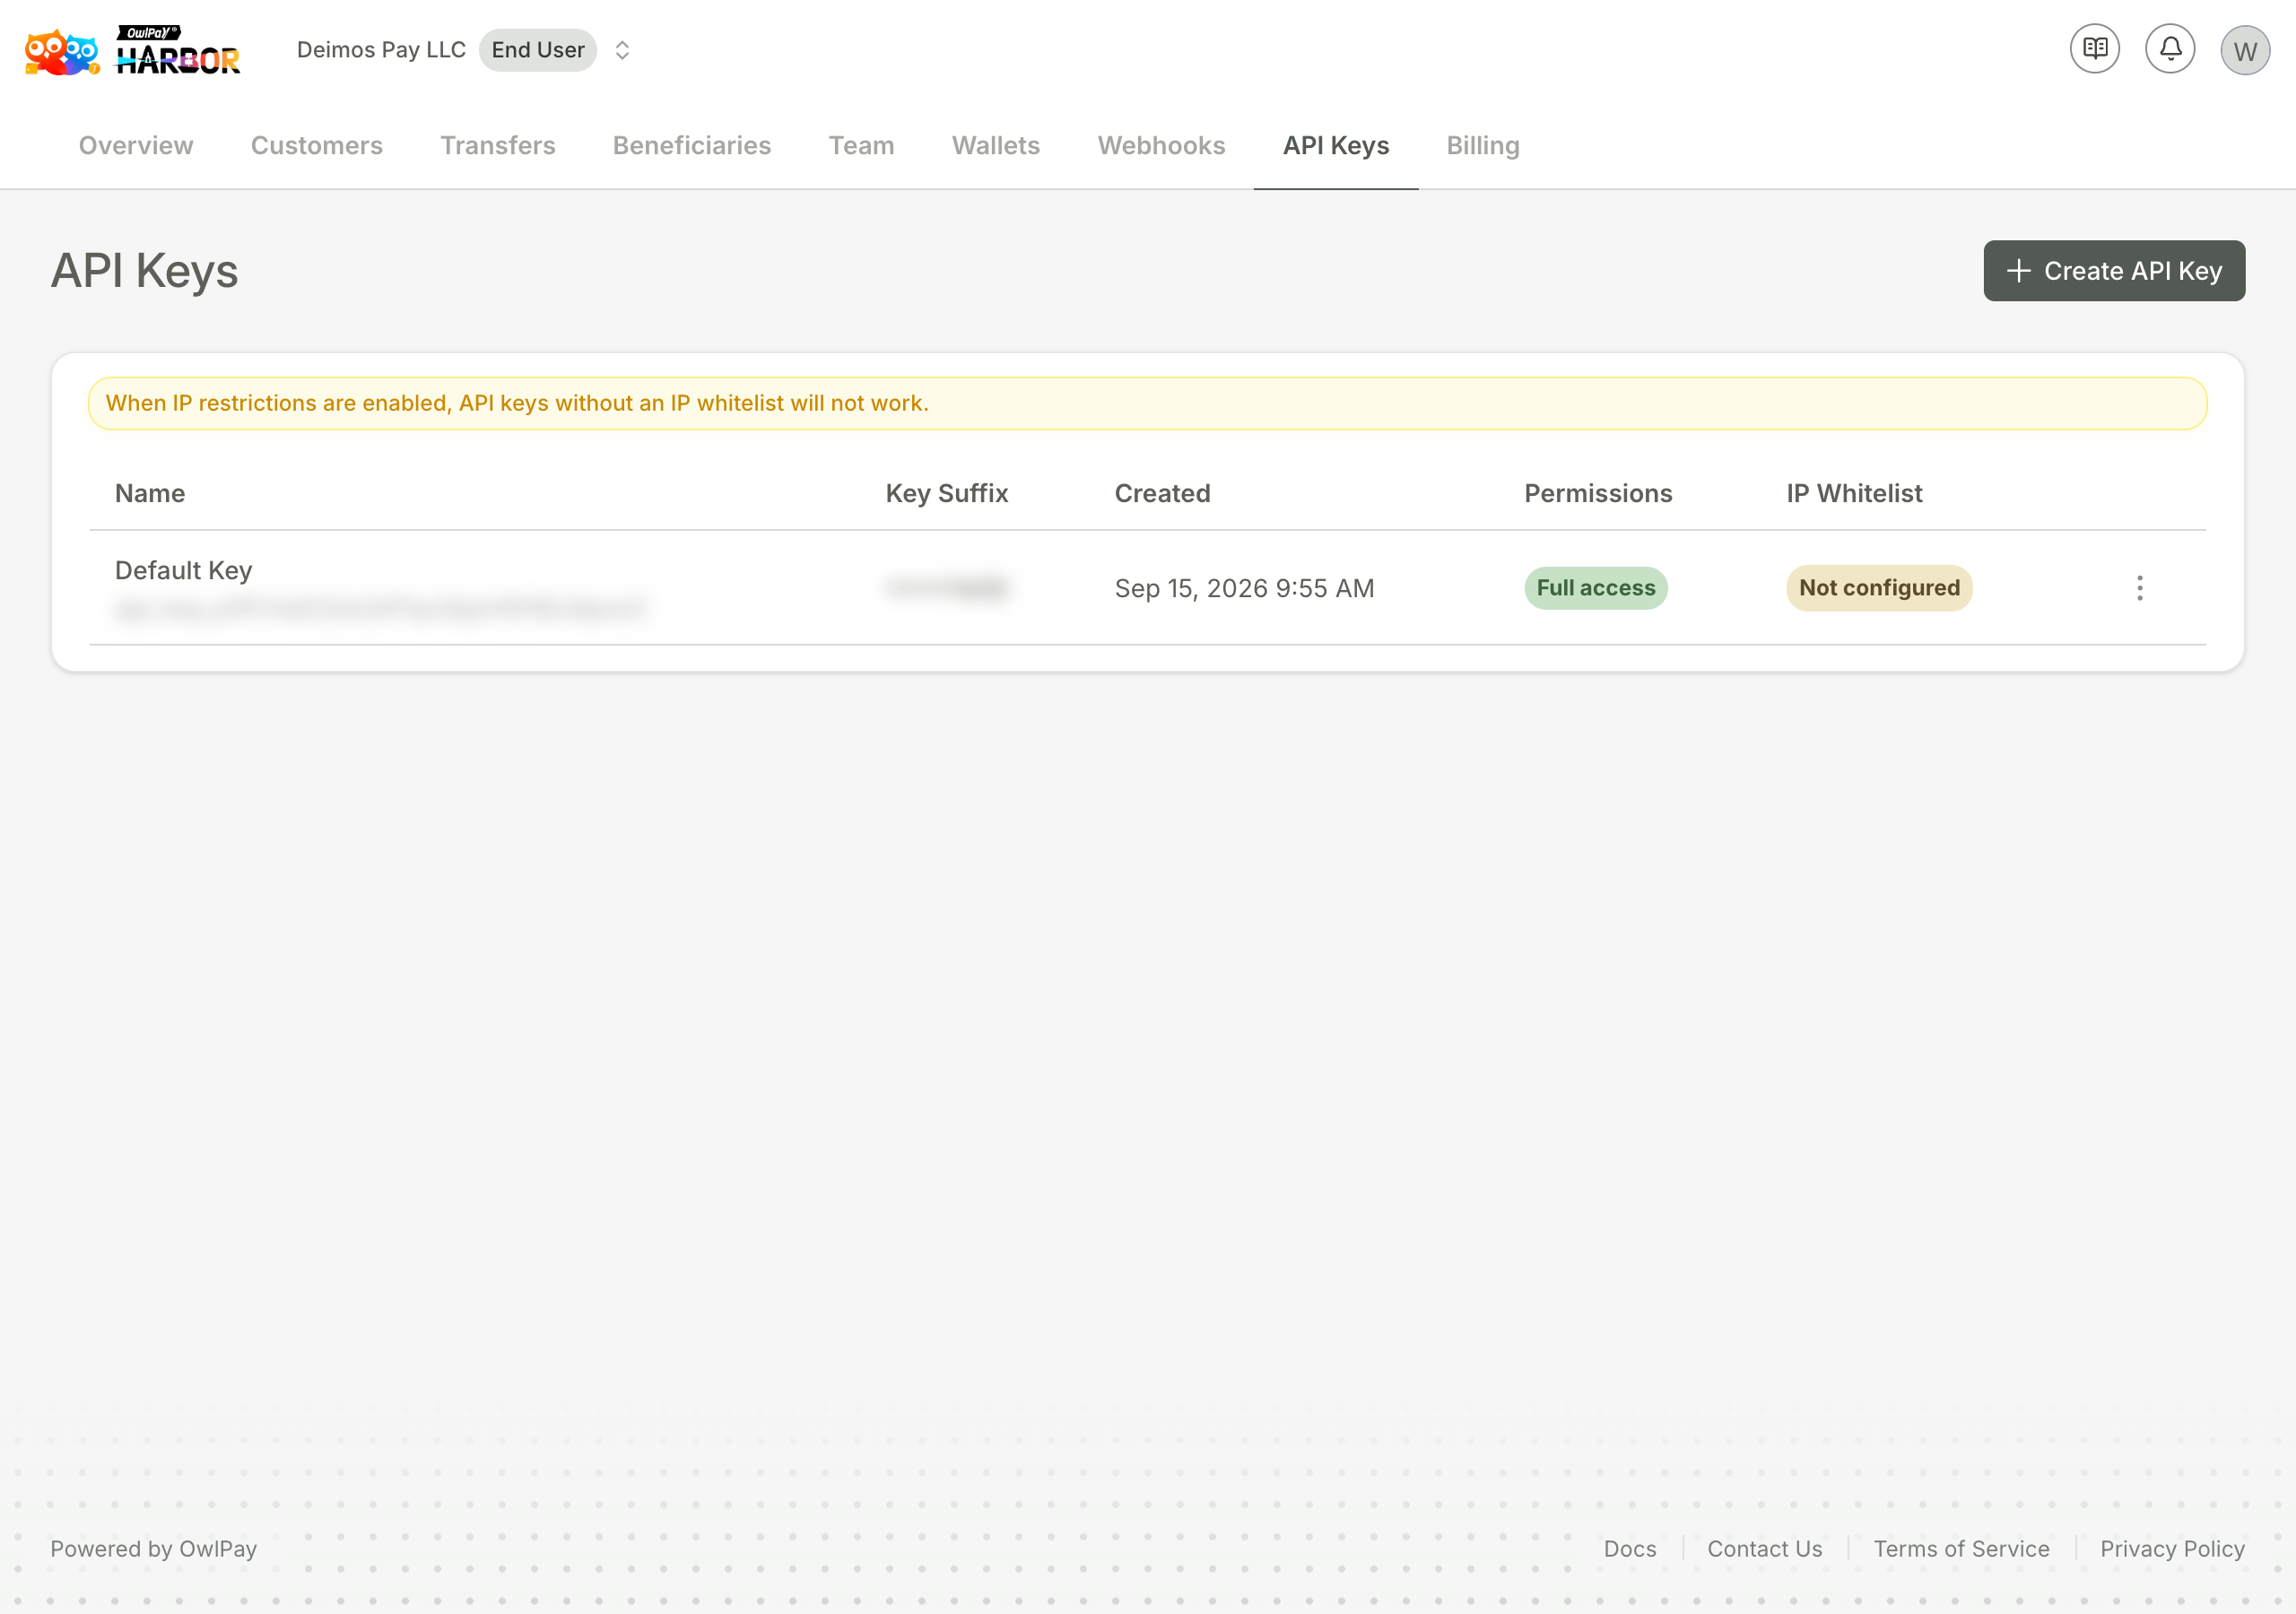
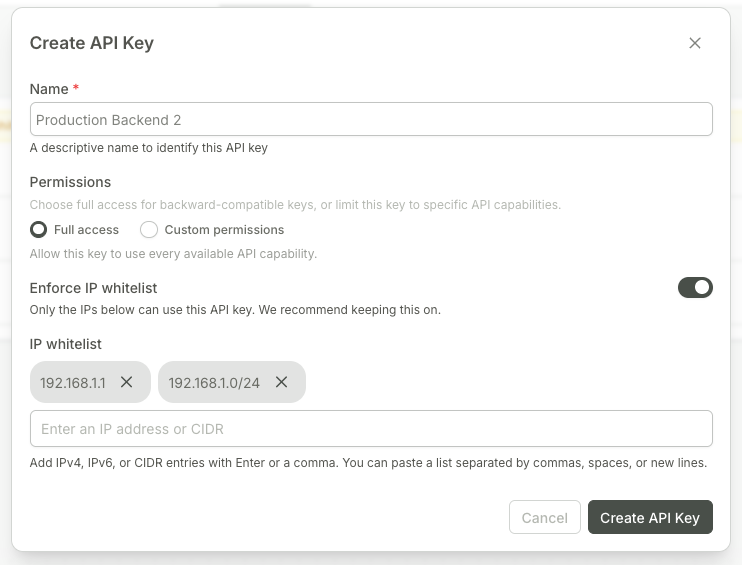
The key is shown only once. If you lose it, create a new one.
Choose Permissions
What a key can do.
- Full access: every API capability. This is the default, and it works with existing integrations.
- Custom permissions: only the capabilities you select. Select at least one.
PROTECT YOUR DATA
We recommend giving each key only the permissions it needs. Full access can delete Customers, wallets, recipients and webhooks.
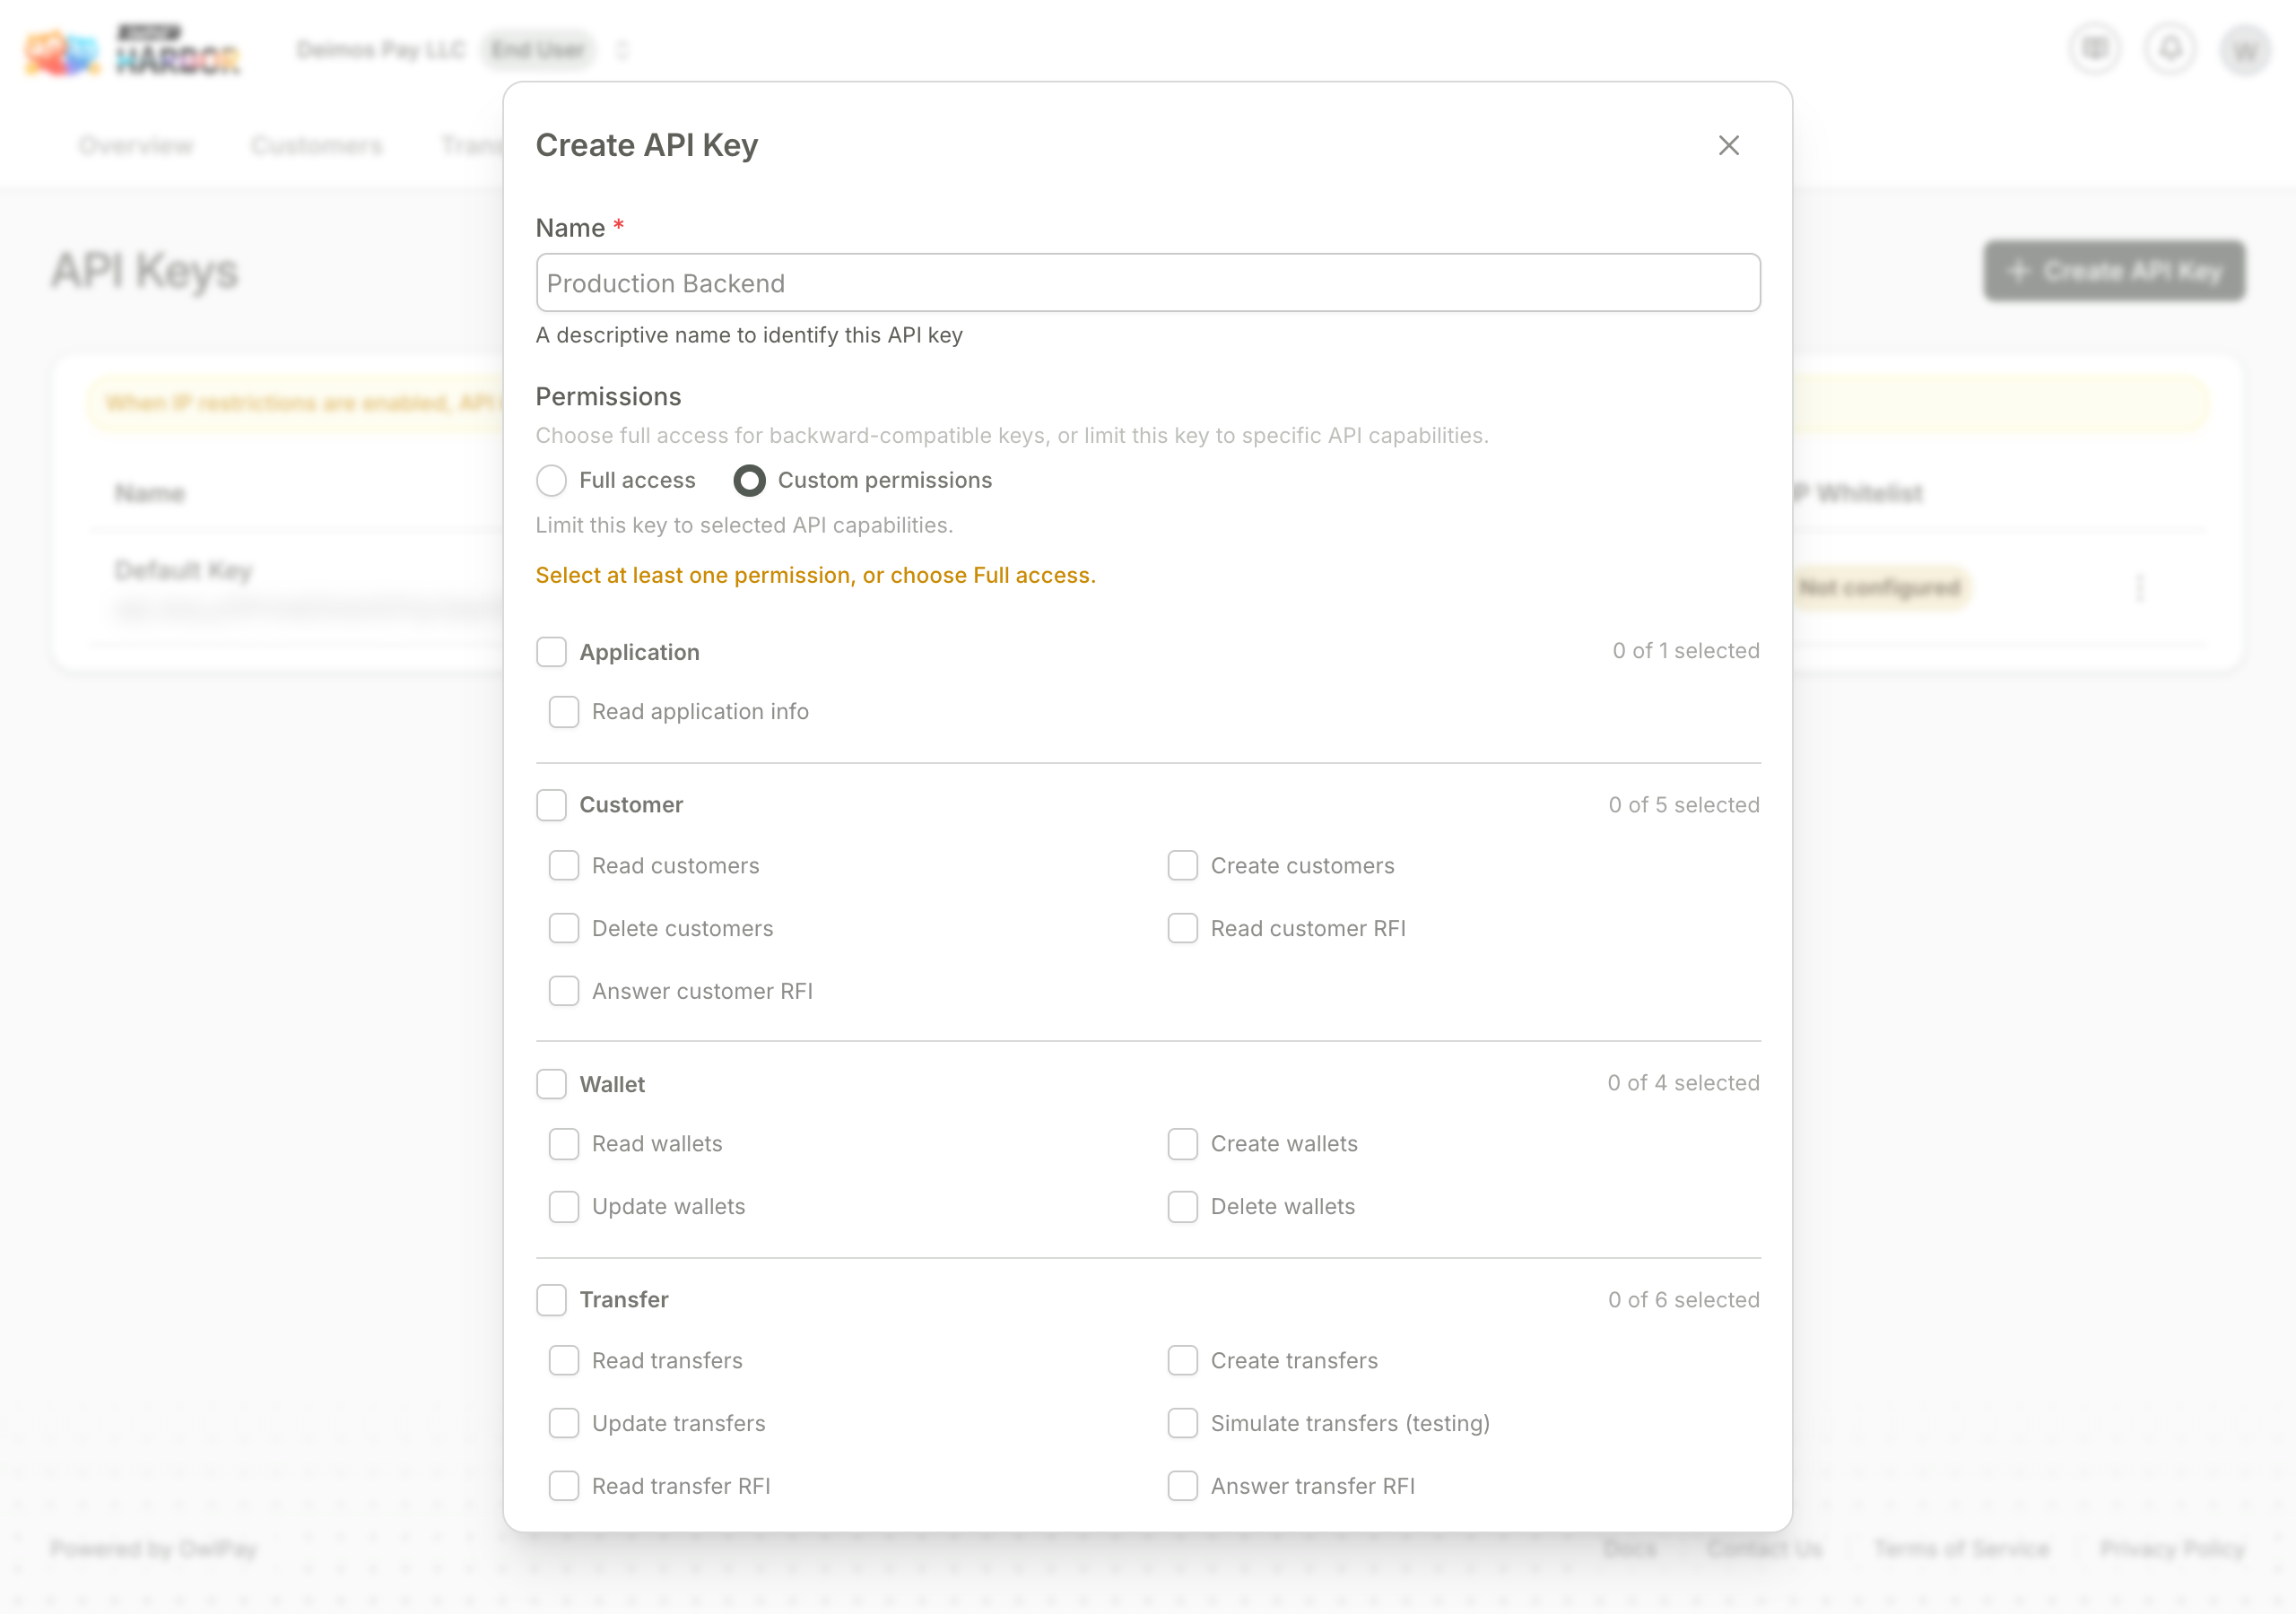
The custom permissions are grouped by resource:
| Group | Permissions |
|---|---|
| Application | Read |
| Customer | Read, create, delete, read RFI, answer RFI |
| Wallet | Read, create, update, delete |
| Transfer | Read, create, update, simulate (testing), read RFI, answer RFI |
| Recipient | Read, create, update, delete |
| Reconciliation | Read |
| Webhook | Read, create, update, delete subscriptions |
| Faucet | Claim testnet funds |
Update a Key
How to add addresses to a key you already created, or change whether the whitelist is enforced.
- Open API Keys in the Portal.
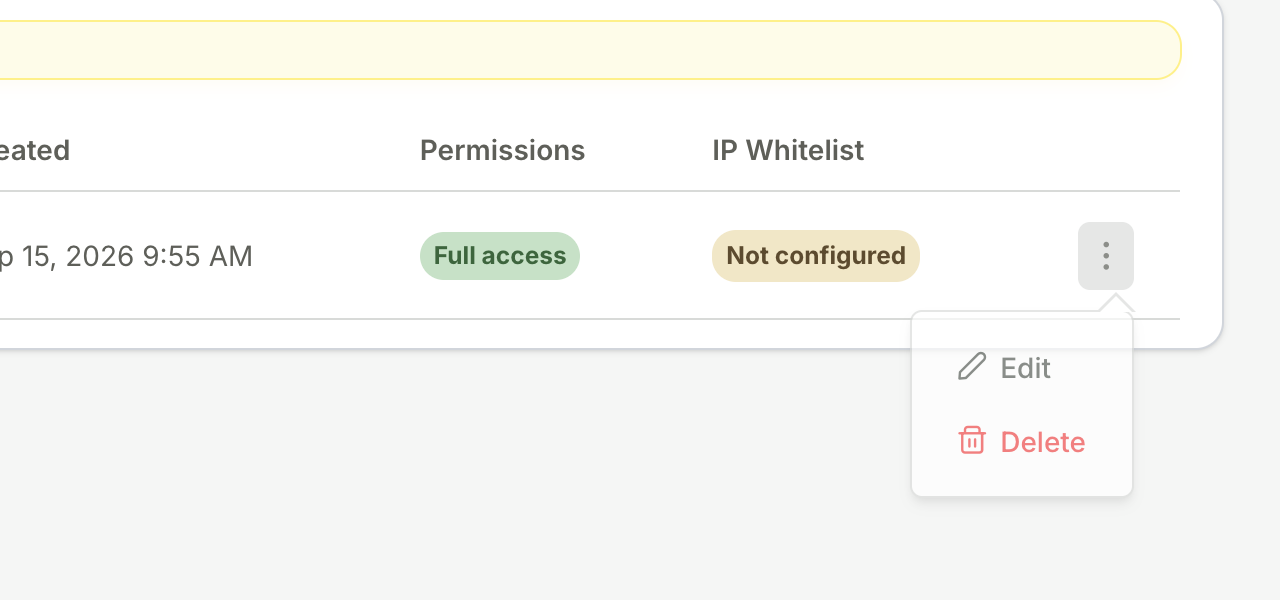
- Click the menu at the end of the key's row, and select Edit.
- Add your authorized IP addresses to the IP whitelist field.
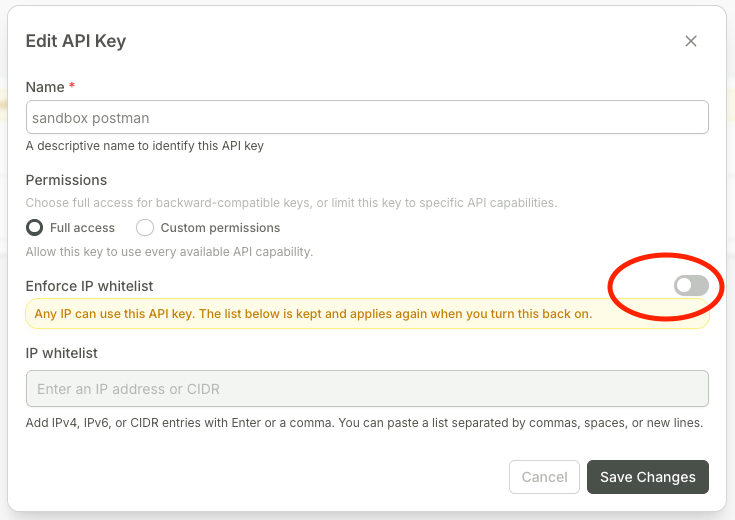
- To let any IP use the key, turn Enforce IP whitelist off. You are responsible for the key's security.
- Save your changes.
Repeat this for every active key.
Restrict by IP
Choose which IP addresses can use a key.
How It Works
- Each key has an IP whitelist, the addresses that can use it.
- Enforce IP whitelist decides if Harbor checks the whitelist. It is on by default, also for existing keys.
- When it is on, a request from an IP that is not on the whitelist gets
403(error code1009).
You have two options for each key.
Only Allow Listed IPs
Only the IPs on the whitelist can use the key.
- Enter IPv4, IPv6 or CIDR ranges.
- Press Enter or type a comma after each one. You can also paste a list.
- A key with an empty whitelist stops working on November 1, 2026. The key list shows Not configured for it.
Allow Any IP
Any IP can use the key. You are responsible for its security.
- Turn Enforce IP whitelist off in the Create or Edit dialog. The Portal asks you to confirm.
- When it is off, you can't edit the whitelist. The entries stay, and you can turn it on again.
- The key list shows Disabled for the key.
Call the API
Send the key in the header of every request:
curl --location --request GET 'https://harbor-sandbox.owlpay.com/api/v1/customers' \
--header 'Accept: application/json' \
--header 'X-API-KEY: {{API_KEY}}'
Notes
- A request without a key, or with an invalid key, returns
401. - Requests must use HTTPS. HTTP requests are rejected.
- Keep keys out of public repositories and client-side code, and store them securely.
- Use a separate key for each environment.
- For the IP whitelist, enter the public IP address of the server that calls the Harbor API. Don't enter a website address
Updated about 14 hours ago